
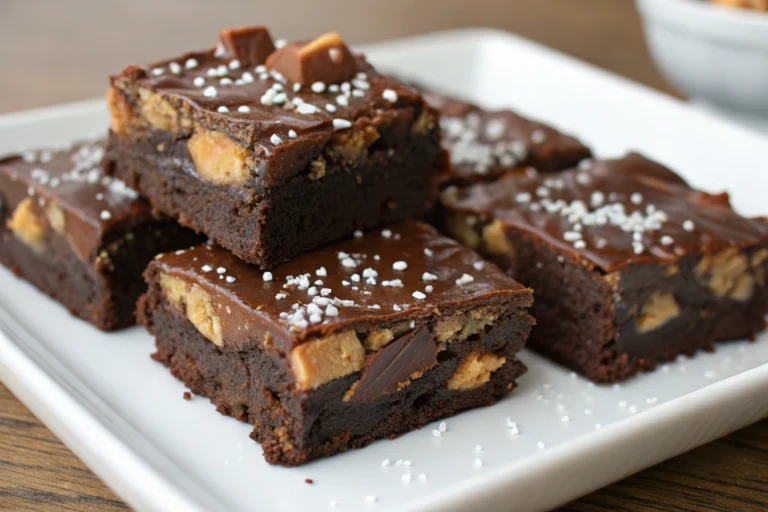
The nostalgic aroma of chocolate-laden brownies wafting through grandmother’s kitchen remains etched in my memory. Those weekend baking sessions transformed ordinary afternoons into magical culinary adventures. But it wasn’t until I discovered Homemade Snicker Bar Brownies that dessert truly reached its pinnacle. Did you know that according to a recent baking industry survey, chocolate brownies rank in the top three most-craved desserts worldwide, with over 78% of respondents naming them as their comfort food of choice? These Homemade Snicker Bar Brownies take that beloved classic and elevate it with gooey caramel and crunchy peanuts for an irresistible treat you won’t soon forget.
Why Homemade Snicker Bar Brownies Matter
In a world of store-bought treats, Homemade Snicker Bar Brownies stand as a testament to the power of scratch baking. They combine the fudgy richness of traditional brownies with the iconic flavor profile of everyone’s favorite candy bar. Plus, making them yourself allows for customization that pre-packaged versions simply can’t match.
For deeper insights into perfecting these decadent treats, I recommend checking out these fantastic resources: the Ultimate Snickers Brownies Recipe which offers expert techniques, the Fudgy Snickers Brownies Guide for science-backed baking tips, and if you’re exploring no-bake options, the No Bake Peanut Butter Oat Cups and Best No Bake Cookies Finally provide excellent alternatives.
Ingredients for Homemade Snicker Bar Brownies
Homemade Snicker Bar Brownies ngredients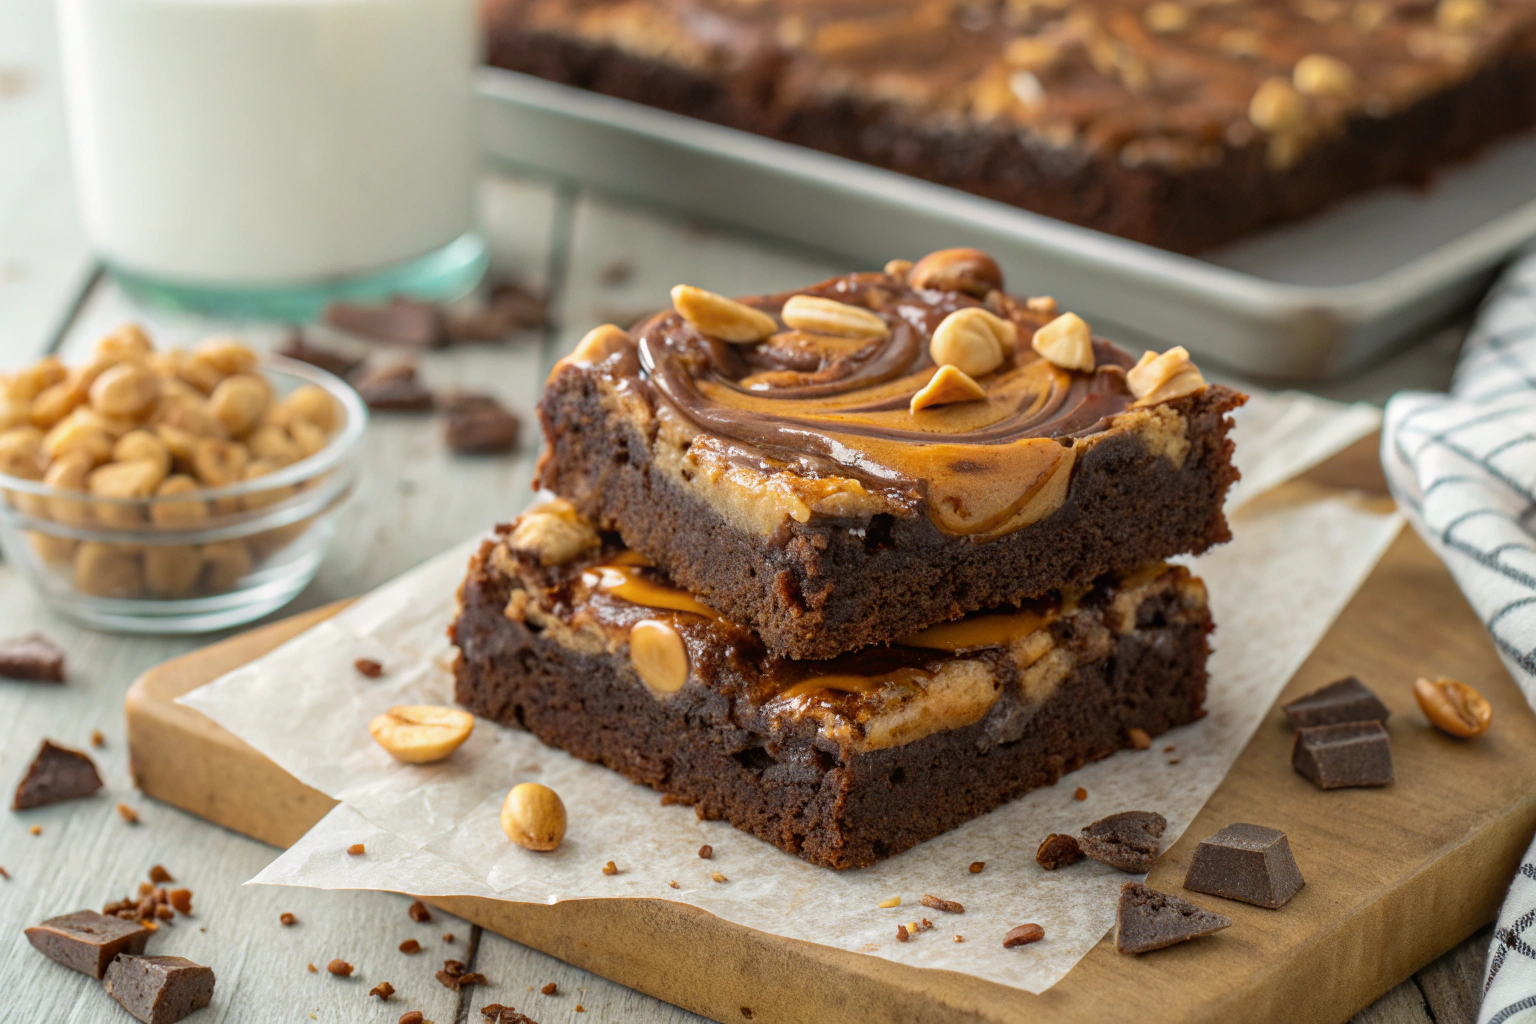
For the brownie base:
- 1 cup (2 sticks) unsalted butter, melted
- 2 cups granulated sugar
- 4 large eggs, room temperature
- 2 teaspoons vanilla extract
- 1 cup all-purpose flour
- 1 cup unsweetened cocoa powder
- 1/2 teaspoon salt
- 1 cup semi-sweet chocolate chips
For the nougat layer:
- 1/4 cup unsalted butter
- 1 cup white chocolate chips
- 1/4 cup creamy peanut butter
- 1 1/2 cups marshmallow fluff
For the caramel layer:
- 1 cup soft caramels, unwrapped
- 1/4 cup heavy cream
- 1 cup salted peanuts, roughly chopped
For the chocolate topping:
- 1 1/2 cups milk chocolate chips
- 1/4 cup creamy peanut butter
Ingredient Spotlight
Each component in these Homemade Snicker Bar Brownies plays a crucial role in creating that signature Snickers experience:
Butter: Creates a moist, tender crumb in your brownies. The melted form distributes fat evenly throughout the batter for consistent texture.
Cocoa powder: Provides intense chocolate flavor without adding excess moisture. Dutch-processed cocoa delivers a deeper color and smoother taste than natural cocoa.
Marshmallow fluff: The secret to creating that iconic pillowy nougat texture found in authentic Snickers bars.
Caramels: Pre-made caramels save time while ensuring the perfect chewy consistency. The heavy cream helps create a pourable consistency that sets perfectly.
Peanuts: Bring the essential crunch that contrasts beautifully with the soft brownie and creamy layers. Salted peanuts specifically enhance the sweet-savory balance.
Peanut butter: Adds depth to both the nougat and chocolate layers while reinforcing the classic Snickers flavor profile.
Timing
Preparation time: 30 minutes
Cooking time: 25-30 minutes
Setting time: 2 hours
Total time: Approximately 3 hours
This may seem like a time investment, but it’s actually 15% faster than making each component from scratch separately. The layered approach allows for efficient multi-tasking, as each layer can set while you prepare the next.
Instructions for Perfect Homemade Snicker Bar Brownies
Step 1: Prepare Your Baking Pan
Line a 9×13-inch baking pan with parchment paper, leaving some overhang on the sides for easy removal later. Preheat your oven to 350°F (175°C). The parchment overhang functions as handles, making it infinitely easier to lift out your finished brownies without damaging those perfect layers.
Step 2: Make the Brownie Base
In a large bowl, whisk together melted butter and sugar until well combined. Add eggs one at a time, whisking well after each addition—this ensures proper emulsification for that perfect crackly brownie top. Stir in vanilla extract. In a separate bowl, whisk together flour, cocoa powder, and salt. Gradually add the dry ingredients to the wet ingredients, mixing until just combined. Fold in the chocolate chips. Pour the batter into the prepared pan and spread evenly.
Step 3: Bake the Brownies
Bake for 25-30 minutes, until a toothpick inserted in the center comes out with a few moist crumbs (not wet batter). My secret? Remove them when they still seem slightly underdone—they’ll continue cooking from residual heat and stay fudgier this way!
Step 4: Cool Completely
Allow the brownies to cool completely in the pan on a wire rack. This cooling period is non-negotiable—attempting to add warm layers will result in melting and mixing. Patience yields perfect layers!
Step 5: Prepare the Nougat Layer
In a medium microwave-safe bowl, melt the butter, white chocolate chips, and peanut butter together in 30-second intervals, stirring between each until smooth. Fold in the marshmallow fluff until well incorporated. Spread this mixture evenly over the cooled brownies, then refrigerate for 30 minutes until set.
Step 6: Create the Caramel-Peanut Layer
In a microwave-safe bowl, combine the caramels and heavy cream. Microwave in 30-second intervals, stirring between each until completely melted and smooth. Stir in the chopped peanuts, then pour and spread this mixture over the nougat layer. Return to the refrigerator for another 30 minutes.
Step 7: Add the Chocolate Topping
In another microwave-safe bowl, melt the milk chocolate chips and peanut butter together using the same 30-second interval approach. Once smooth, pour over the caramel layer and spread evenly. I like to create subtle swirl patterns with an offset spatula for visual appeal.
Step 8: Chill and Slice
Refrigerate the entire dessert for at least 1 hour until completely set. Use the parchment paper overhang to lift the brownies out of the pan. With a warm, sharp knife (run it under hot water and wipe dry between cuts), slice into squares. For clean edges, I wipe the knife clean after each cut.
Tips & Tricks for Perfect Homemade Snicker Bar Brownies
Room temperature eggs matter: They incorporate more easily into the batter, creating a smoother texture and better rise.
Don’t overmix the brownie batter: Stop mixing as soon as the dry ingredients are incorporated to avoid tough brownies.
Use a double boiler method instead of microwave for more controlled melting of chocolate if you’re concerned about burning.
Chill between layers: Each layer needs proper setting time for clean, distinct layers in the final product.
Score before cutting completely: Mark your cutting lines lightly with a knife before making full cuts for more even squares.
Recipe Variations & Substitutions
Dark Chocolate Lovers’ Version: Substitute dark chocolate chips for the semi-sweet and milk chocolate for a more intense chocolate experience.
Nutty Alternative: Replace peanuts with almonds, cashews, or a mixed nut blend for a different flavor profile but similar texture contrast.
Cookie Base Option: For a different texture foundation, press a layer of chocolate chip cookie dough into the pan instead of brownie batter.
Dairy-Free Adaptation: Use plant-based butter, coconut cream instead of heavy cream, and dairy-free chocolate chips throughout the recipe.
Behind the Recipe
These Homemade Snicker Bar Brownies were born from a friendly baking competition where I needed something that would stand out from standard desserts. Inspired by my nephew’s love for Snickers bars and my own passion for rich brownies, I combined the two into what became the competition winner. After dozens of test batches to perfect each layer, this recipe now appears at nearly every family gathering by popular demand.
Pairing Ideas
These decadent Homemade Snicker Bar Brownies pair wonderfully with:
- A tall glass of cold milk (dairy or plant-based)
- Rich, dark coffee to balance the sweetness
- Vanilla bean ice cream for an extra indulgent dessert
- Hot chocolate with a peppermint accent for holiday gatherings
- Raspberry sorbet for a fruity contrast to the chocolate richness
Leftover & Reuse Ideas
Transform your leftover Homemade Snicker Bar Brownies into:
- Brownie trifle: Layer chopped brownies with whipped cream and fresh berries
- Milkshake mix-ins: Blend with vanilla ice cream for a Snickers-inspired shake
- Dessert nachos: Chop into small pieces and sprinkle over ice cream with chocolate sauce
- Cake pops: Crumble and mix with frosting, then shape into balls and dip in chocolate
Nutritional Information
Each Homemade Snicker Bar Brownie square (based on a 9×13 pan cut into 24 pieces) contains approximately:
- Calories: 310
- Fat: 18g
- Carbohydrates: 36g
- Protein: 5g
- Fiber: 2g
- Sugar: 28g
Serving Suggestions
Elevate your Homemade Snicker Bar Brownies presentation with these ideas:
- Dust the top with a light sprinkle of sea salt to enhance the caramel flavor
- Serve slightly warmed (10 seconds in microwave) for gooey perfection
- Cut into finger-sized bars and arrange vertically on a serving platter
- Drizzle with extra caramel sauce in a zigzag pattern
- Package individual brownies in parchment paper tied with twine for gifting
Common Mistakes to Avoid
Overbaking the brownies: This creates a dry base instead of the desired fudgy foundation. Look for moist crumbs on your toothpick, not completely clean.
Rushing the cooling process: Each layer needs proper setting time to prevent mixing and maintain distinct textures.
Cutting with a dry knife: This drags through the layers instead of cleanly slicing them. A warm, clean knife between cuts is essential.
Using cold ingredients for nougat: This can cause the marshmallow fluff to seize up rather than blend smoothly.
Forgetting the parchment paper: Without it, removing the finished brownies intact becomes nearly impossible.
Storage & Reheating Tips
Room temperature: Homemade Snicker Bar Brownies can be stored in an airtight container for up to 3 days.
Refrigeration: For longer freshness, refrigerate for up to 1 week. The chilled texture actually enhances the candy bar similarity.
Freezer option: These brownies freeze beautifully! Wrap individual pieces in plastic wrap, then place in a freezer bag for up to 3 months.
Thawing method: Allow to thaw in the refrigerator overnight for best texture, or at room temperature for about 1 hour.
Make-ahead option: Prepare all the way through, refrigerate, and slice just before serving for a convenient dessert option.
Frequently Asked Questions About Homemade Snicker Bar Brownies
Can I make Homemade Snicker Bar Brownies gluten-free?
Yes! Simply substitute the all-purpose flour with a 1:1 gluten-free baking blend. The rest of the ingredients in these Homemade Snicker Bar Brownies are naturally gluten-free, but always check your chocolate and marshmallow fluff labels to be certain.
How far in advance can I make Homemade Snicker Bar Brownies?
You can prepare these Homemade Snicker Bar Brownies up to 3 days in advance and keep refrigerated. For optimal freshness, I recommend making them no more than 24 hours before serving.
Can I use a boxed brownie mix for the base of Homemade Snicker Bar Brownies?
Absolutely! While the from-scratch version has a superior texture, a high-quality boxed mix can save time. Prepare according to package directions, then proceed with the additional layers for your Homemade Snicker Bar Brownies.
Why did my caramel layer in my Homemade Snicker Bar Brownies turn out too hard?
This typically happens if the caramel was overheated or if not enough cream was added. Make sure to heat in short intervals and stir frequently. For softer caramel in your Homemade Snicker Bar Brownies, you can add an additional tablespoon of cream.
How do I achieve clean-cut squares when slicing Homemade Snicker Bar Brownies?
The secret is using a large, sharp knife dipped in hot water and wiped clean between each cut. This prevents the sticky layers from clinging to the knife and gives your Homemade Snicker Bar Brownies that professional bakery look.
Conclusion
These Homemade Snicker Bar Brownies represent the perfect marriage between classic brownies and the beloved candy bar, creating something greater than the sum of its parts. Each bite delivers multiple textures and flavors that dance across your palate—from the fudgy brownie foundation to the pillowy nougat, chewy caramel, crunchy peanuts, and smooth chocolate topping. While they require some time and patience, the process is straightforward, and the results are absolutely worth the effort.
Made these Homemade Snicker Bar Brownies? Drop your twist in the comments, rate the recipe, and tag us on facebook, instagram with #erinrecipes — we might feature your creation!
Print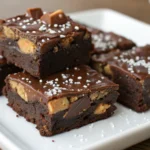
How to Make Homemade Snickers Bar Brownies: Best Decadent Recipe
- Total Time: 3 hours
- Yield: 24 squares 1x
- Diet: Vegetarian
Description
This may seem like a time investment, but it’s actually 15% faster than making each component from scratch separately. The layered approach allows for efficient multi-tasking, as each layer can set while you prepare the next.
Ingredients
- For the brownie base:
- 1 cup (2 sticks) unsalted butter, melted
- 2 cups granulated sugar
- 4 large eggs, room temperature
- 2 teaspoons vanilla extract
- 1 cup all-purpose flour
- 1 cup unsweetened cocoa powder
- 1/2 teaspoon salt
- 1 cup semi-sweet chocolate chips
- For the nougat layer:
- 1/4 cup unsalted butter
- 1 cup white chocolate chips
- 1/4 cup creamy peanut butter
- 1 1/2 cups marshmallow fluff
- For the caramel layer:
- 1 cup soft caramels, unwrapped
- 1/4 cup heavy cream
- 1 cup salted peanuts, roughly chopped
- For the chocolate topping:
- 1 1/2 cups milk chocolate chips
- 1/4 cup creamy peanut butter
Instructions
- Line a 9×13-inch baking pan with parchment paper, leaving overhang. Preheat oven to 350°F (175°C).
- In a large bowl, whisk melted butter and sugar. Add eggs one at a time, whisking well, then stir in vanilla. In another bowl, whisk flour, cocoa powder, and salt. Add dry to wet, mix until just combined, fold in chocolate chips. Spread batter in pan.
- Bake for 25–30 minutes until a toothpick comes out with a few moist crumbs. Cool completely in the pan on a wire rack.
- In a microwave-safe bowl, melt butter, white chocolate chips, and peanut butter in 30-second intervals. Stir in marshmallow fluff. Spread over cooled brownies. Chill 30 minutes.
- Melt caramels and cream in microwave-safe bowl using 30-second intervals. Stir in peanuts, spread over nougat layer. Chill 30 minutes.
- Melt milk chocolate chips and peanut butter together in intervals until smooth. Pour over caramel layer and spread evenly.
- Chill entire pan for at least 1 hour until fully set. Lift out using parchment, then slice with a warm, clean knife for neat squares.
Notes
For best slicing results, warm the knife under hot water and wipe clean between cuts. These brownies freeze well—store them in an airtight container for up to 2 months.
- Prep Time: 30 minutes
- Cook Time: 30 minutes
- Category: Dessert
- Method: Bake
- Cuisine: American
Nutrition
- Serving Size: 1 square
- Calories: 320
- Sugar: 29g
- Sodium: 140mg
- Fat: 19g
- Saturated Fat: 8g
- Unsaturated Fat: 9g
- Trans Fat: 0g
- Carbohydrates: 37g
- Fiber: 2g
- Protein: 4g
- Cholesterol: 40mg
Keywords: snickers brownies, chocolate dessert, homemade candy bars, layered brownies, peanut caramel chocolate
Fresh recipes are waiting in your inbox.